how to fix a broken mirror
Doesn't matter if it's a bathroom mirror or a tabletop tri-fold mirror, a broken mirror is not a good sight. Aside from looking unpleasant, a broken piece of a mirror also destroys your reflection and makes it quite difficult to view your face properly and apply flawless makeup.

Sabrina has been experiencing the difficulties of a broken mirror for the last couple of days; however, as this mirror is one of her favorite vanity accessories, she doesn't want to throw it away. Instead, she has been looking for some DIY ways to repair her loved mirror so that it becomes as perfect as a new one.
To help Sabrina and many others facing similar situations, in this article, we have presented you a step by step guide to fix a broken makeup mirror so that you can do it yourself easily and quickly.
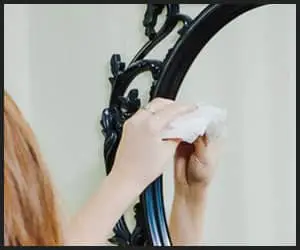
Begin your mirror repairing session by cleaning it to remove all the dirt, dust, and broken mirror particles completely. You can use either a professional mirror cleaner like the TriNova Premium Mirror Streak-Free Cleaner or wipe the reflective surface with just soapy water and cleaning cloth to clean the mirror perfectly. Use a microfiber cloth (try out this Microfiber Glass Cleaning Cloth) to wipe the glass panel without any streaks or spots.
Cleaning the mirror surface is a crucial stage because the leftover dirt, dust, and debris have the potential to affect the repair method and that's why you must never neglect this stage ever.
Step 2: Place a Stabilizer Film over the Crack
Once the mirror surface is perfectly cleaned, now it's time to apply a stabilizer film over it. A mirror stabilizer film, such as the Frienda Waterproof Mirror Film, helps you to hold the resin (that you are going to apply later) securely in place so that the mirror repairing process becomes more effective and easier for you.
To place the stabilizer film, first, you need to remove the adhesive backing of the film carefully to make sure that it doesn't stick to itself. Also, remember to remove the adhesive back right before you place it on the mirror, otherwise, it might no longer be as effective.
After removing the adhesive, immediately place the stabilizer film over the broken section and press it nicely so that it is attached precisely. If it is not placed perfectly, do not remove and reapply the same film twice. It might leave behind a sticky residue.
One you pressed and attached the film over the crack without any bubble and creases use your fingertips to smooth it out and make sure that it creates a tight seal over the crack.
Step 3: Fill the Broken Section with Epoxy Resin
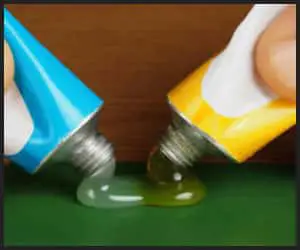
After the stabilizer film is placed properly, now it's time to move on to the epoxy resin. Use epoxy resin like this J-B Weld 50112 ClearWeld Epoxy Syringe, to recover the broken part completely.
First, remove the film slightly from the mirror and insert the tip of the resin-filled syringe inside it. Then slowly, with gentle pressure, push on the plunger and fill the gap with the resin.
The film will help to keep the resin in place until it's dried down.
Step 4: Let the Resin Set
Once you are done filling the crack with epoxy resin, don't work on it immediately. Wait for 20-30 minutes and allow it to rest and harden in the crack for good.
Do not move the mirror or give it a shake to see if the epoxy is set or not. Leave it untouched during the drying period.
Step 5: Peel off the Stabilizer Film
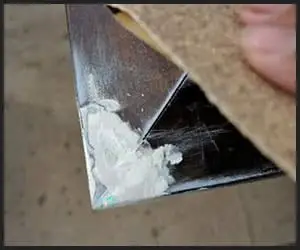
After 20-30 minutes, when the epoxy resin is hard and set properly, it's now time to move to the next step; peel off the stabilizer film from over the resin. Using your fingernails, pry up a corner of the film and using one smooth yet firm motion, pull off the film to reveal the epoxy underneath.
We are suggesting peeling it off at once because tearing off a section of the film would make it difficult to remove it from over the resin.
Step 6: Scrape Away the Excess Resin
Once the resin is exposed, now it's time to scrap away the excess resin and reveal your fresh makeup mirror.
To remove the excess epoxy, first, take a razor blade or a utility knife and start scrapping over the top of the broken section gently to remove the excess resin. Keep on scrapping until the resin layer is flat with the mirror surface.
However, while doing so, be utmost careful not to shred away the resin of your mirror, otherwise, instead of repairing your favorite mirror, you might cause more breakage to it.
Step 7: Clean the Mirror Properly
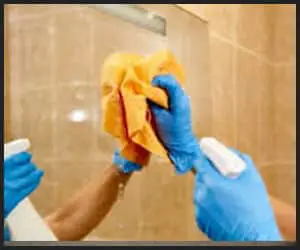
After that, clean the mirror with a glass cleaner to remove all the scrapped out epoxy particles from its surface. Once the mirror is cleaned, you would notice a reflective as sparkly and as flawless as a new one.
Now that you know how to repair a broken makeup mirror easily yet effectively at the comfort of your home, we are confident that you would be able to repair your effortlessly. Using this article as your guide and we can assure you that at the end of the day you would be successful in fixing your favorite piece of vanity accessory.

how to fix a broken mirror
Source: https://www.instraight.com/best-lighted-makeup-mirror-review-guide/tips/how-to-fix-a-broken-makeup-mirror/
Posted by: campbellhavot1998.blogspot.com

0 Response to "how to fix a broken mirror"
Post a Comment